Horizon Client Installer Failed

Horizon Client Installer Failed

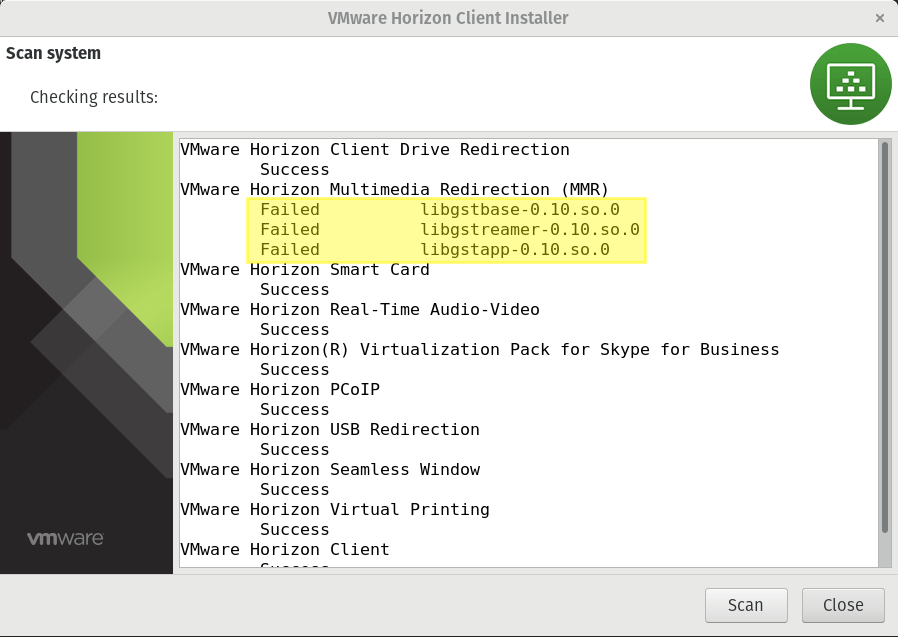
The Horizon Client installer generates the following errors for Multimedia Redirection:

Horizon Client MMR fails

Adding the following symlinks made the failure message go away. I’m wondering though if the packages get updated in the repositories whether this will break the Multimedia Redirection (MMR). I guess I’ll notice some day.

Update (2019/12/20): Today I updated from version 5.2 to 5.3 and ran into the same issue again. I noticed that there are symbolic links present but that they linked to the old versions. After updating the symbolic links the installer was happy again.

Successful Horizon Client installation

Through https://communities.vmware.com I found
https://www.werts.nl/vmware-view-horizon-client-for-linux-on-ubuntu-18-04-failed/

Reconfigure diagnostic partition using Get-EsxCli -V2

Reconfigure diagnostic partition using Get-EsxCli -V2

The following powershell snippet is going to unconfigure the diagnostic coredump partition using the esxcli version 2 cmdlet. The second part will reconfigure the diagnostic partition with the ‘smart’ option so that an accessible partition is chosen.

If you want to configure a new diagnostic partition the you will find the necessary information in the following VMware knowledge base article: Configuring a diagnostic coredump partition on an ESXi 5.x/6.x host (2004299). There will be additional steps to supply the partition id.

$srv = Get-VMHost ESXiHost
$esxcli = Get-EsxCli -VMHost $srv -V2
$arg = $esxcli.system.coredump.partition.set.CreateArgs()
$arg.unconfigure = "true"
$esxcli.system.coredump.partition.set.Invoke($arg)
$arg = $esxcli.system.coredump.partition.set.CreateArgs()
$arg.unconfigure = "false"
$arg.enable = "true"
$arg.smart = "true"
$esxcli.system.coredump.partition.set.Invoke($arg)
PowerShell

First we connect to the esxi host directly and insert the connection details in the variable $srv:

$srv = Get-VMHost ESXiHost
$esxcli = Get-EsxCli -VMHost $srv -V2
$arg = $esxcli.system.coredump.partition.set.CreateArgs()
$arg.unconfigure = "true"
$esxcli.system.coredump.partition.set.Invoke($arg)
$arg = $esxcli.system.coredump.partition.set.CreateArgs()
$arg.unconfigure = "false"
$arg.enable = "true"
$arg.smart = "true"
$esxcli.system.coredump.partition.set.Invoke($arg)
PowerShell

Then we create a esxcli object $esxcli using the variable $srv we created previously:

$srv = Get-VMHost ESXiHost
$esxcli = Get-EsxCli -VMHost $srv -V2
$arg = $esxcli.system.coredump.partition.set.CreateArgs()
$arg.unconfigure = "true"
$esxcli.system.coredump.partition.set.Invoke($arg)
$arg = $esxcli.system.coredump.partition.set.CreateArgs()
$arg.unconfigure = "false"
$arg.enable = "true"
$arg.smart = "true"
$esxcli.system.coredump.partition.set.Invoke($arg)
PowerShell

Now we create a variable $arg to store the arguments we will provide later:

$srv = Get-VMHost ESXiHost
$esxcli = Get-EsxCli -VMHost $srv -V2
$arg = $esxcli.system.coredump.partition.set.CreateArgs()
$arg.unconfigure = "true"
$esxcli.system.coredump.partition.set.Invoke($arg)
$arg = $esxcli.system.coredump.partition.set.CreateArgs()
$arg.unconfigure = "false"
$arg.enable = "true"
$arg.smart = "true"
$esxcli.system.coredump.partition.set.Invoke($arg)
PowerShell

Setting the $arg property ‘unconfigure’ to true will deactivate the diagnostic partition:

$srv = Get-VMHost ESXiHost
$esxcli = Get-EsxCli -VMHost $srv -V2
$arg = $esxcli.system.coredump.partition.set.CreateArgs()
$arg.unconfigure = "true"
$esxcli.system.coredump.partition.set.Invoke($arg)
$arg = $esxcli.system.coredump.partition.set.CreateArgs()
$arg.unconfigure = "false"
$arg.enable = "true"
$arg.smart = "true"
$esxcli.system.coredump.partition.set.Invoke($arg)
PowerShell

The invoke command will invoke the command remotely on the esxi host. After execution the diagnostic partition is deactivated:

$srv = Get-VMHost ESXiHost
$esxcli = Get-EsxCli -VMHost $srv -V2
$arg = $esxcli.system.coredump.partition.set.CreateArgs()
$arg.unconfigure = "true"
$esxcli.system.coredump.partition.set.Invoke($arg)
$arg = $esxcli.system.coredump.partition.set.CreateArgs()
$arg.unconfigure = "false"
$arg.enable = "true"
$arg.smart = "true"
$esxcli.system.coredump.partition.set.Invoke($arg)
PowerShell

The second part starts with creating a new set of arguments:

$srv = Get-VMHost ESXiHost
$esxcli = Get-EsxCli -VMHost $srv -V2
$arg = $esxcli.system.coredump.partition.set.CreateArgs()
$arg.unconfigure = "true"
$esxcli.system.coredump.partition.set.Invoke($arg)
$arg = $esxcli.system.coredump.partition.set.CreateArgs()
$arg.unconfigure = "false"
$arg.enable = "true"
$arg.smart = "true"
$esxcli.system.coredump.partition.set.Invoke($arg)
PowerShell

Reactivate the coredump, because we deactivated it before:

$srv = Get-VMHost ESXiHost
$esxcli = Get-EsxCli -VMHost $srv -V2
$arg = $esxcli.system.coredump.partition.set.CreateArgs()
$arg.unconfigure = "true"
$esxcli.system.coredump.partition.set.Invoke($arg)
$arg = $esxcli.system.coredump.partition.set.CreateArgs()
$arg.unconfigure = "false"
$arg.enable = "true"
$arg.smart = "true"
$esxcli.system.coredump.partition.set.Invoke($arg)
PowerShell

Enable the coredump partition:

$srv = Get-VMHost ESXiHost
$esxcli = Get-EsxCli -VMHost $srv -V2
$arg = $esxcli.system.coredump.partition.set.CreateArgs()
$arg.unconfigure = "true"
$esxcli.system.coredump.partition.set.Invoke($arg)
$arg = $esxcli.system.coredump.partition.set.CreateArgs()
$arg.unconfigure = "false"
$arg.enable = "true"
$arg.smart = "true"
$esxcli.system.coredump.partition.set.Invoke($arg)
PowerShell

The ‘smart’ property will try to use an accessible partition:

$srv = Get-VMHost ESXiHost
$esxcli = Get-EsxCli -VMHost $srv -V2
$arg = $esxcli.system.coredump.partition.set.CreateArgs()
$arg.unconfigure = "true"
$esxcli.system.coredump.partition.set.Invoke($arg)
$arg = $esxcli.system.coredump.partition.set.CreateArgs()
$arg.unconfigure = "false"
$arg.enable = "true"
$arg.smart = "true"
$esxcli.system.coredump.partition.set.Invoke($arg)
PowerShell

The last argument will configure the diagnostic partition using the supplied parameters:

$srv = Get-VMHost ESXiHost
$esxcli = Get-EsxCli -VMHost $srv -V2
$arg = $esxcli.system.coredump.partition.set.CreateArgs()
$arg.unconfigure = "true"
$esxcli.system.coredump.partition.set.Invoke($arg)
$arg = $esxcli.system.coredump.partition.set.CreateArgs()
$arg.unconfigure = "false"
$arg.enable = "true"
$arg.smart = "true"
$esxcli.system.coredump.partition.set.Invoke($arg)
PowerShell

Configuring Tesla M60 cards for NVIDIA GRID vGPU

Configuring Tesla M60 cards for NVIDIA GRID vGPU

There are a couple of steps which need to be taken to configure the Tesla M60 cards with NVIDIA GRID VGPU in a vSphere / Horizon environment. I have listed them here quick and dirty. They are an extract of the NVIDIA Virtual GPU Software User Guide.

On the host(s):

  1. Install the vib
esxcli software vib install -v directory/NVIDIA-vGPUVMware_ESXi_6.0_Host_Driver_390.72-1OEM.600.0.0.2159203.vib

  1. Reboot the host(s)
  2. Check if the module is loaded
vmkload_mod -l | grep nvidia

  1. Run the nvidia-smi command to verify the correct communication with the device
nvidia-smi

  1. Configure Suspend and Resume for VMware vSphere
esxcli system module parameters set -m nvidia -p “NVreg_RegistryDwords=RMEnableVgpuMigration=1”

  1. Reboot the host(s)
  2. Confirm that suspend and resume is configured
dmesg | grep NVRM

  1. Check that the default graphics type is set to shared direct
  2. If the graphics type were not set to shared direct, execute the following commands to stop and start the xorg and nv-hostengine services
/etc/init.d/xorg stop
nv-hostengine -t
nv-hostengine -d
/etc/init.d/xorg start

On the VM / Parent VM:

  1. Configure the VM, beware that once the vGPU is configured that the console of the VM will not be visible/accessible through the vSphere Client. An alternate access method should already be foreseen, e.g. RDP access
  2. Edit the VM configuration to add a shared pci device, verify that NVIDIA GRID vGPU is selected
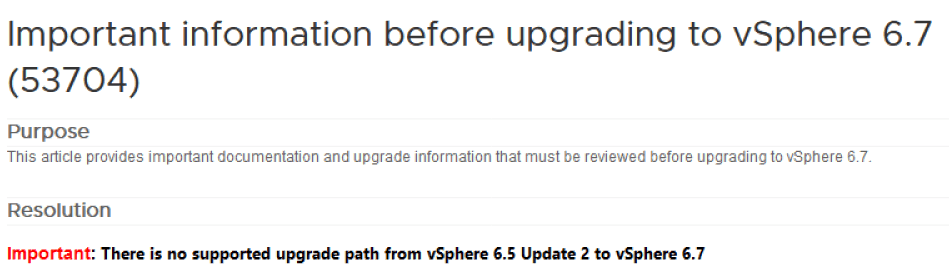
  3. Choose the vGPU profile
    more info on the profiles can be found here under section ‘1.4.1 Virtual GPU Types’: https://docs.nvidia.com/grid/6.0/grid-vgpu-user-guide/index.html
  4. Reserve all guest memory

On the Horizon pool:

  1. Configure the pool to use the NVIDIA GRID vGPU as 3D Renderer
Unsupported upgrade of VCSA 6.5 U2 to 6.7

Unsupported upgrade of VCSA 6.5 U2 to 6.7

Release Notes – There is no supported upgrade path

Important:
vSphere 6.5 Update 2d and higher are not supported to upgrade to vSphere 6.7 Update 1.
vSphere 6.5 Update 2d and higher are supported to upgrade to vSphere 6.7 Update 2. For more information, see VMware Product Interoperability Matrices.


I have applied the following knowledge base articles on the source VCSA:

The first KB was applied because the installer is failing due to a lack of disk space on the source appliance. The installer gives the opportunity to supply a location on the source VCSA to export the necessary files that facilitate the upgrade.

The second KB was applied because the VMware Directory failed during the firstboot phase after the upgrade succeeded.

I downloaded the sources for VCSA 6.7.0 but had to go and download the sources for VCSA 6.7.0a. The VCSA 6.7.0 sources stalled at 5% on VMware Identity Management Service.

I also went to change the root password expiration to no and set the administrator@vsphere.local account password to only include alphabet characters.

The installer will also fail after the first phase if the VAMI port is not reachable, the first phase will finish succesfully though. I forgot to add an exception to my firewall. You can then continue the installer by going to the VAMI interface on port 5480.

 Setting up the lab in Ravello – Part 1 : the jumphost

 Setting up the lab in Ravello – Part 1 : the jumphost

In these series we will create a lab with multiple components, a jumphost, vcsa, esxi, a vsan enabled cluster, nsx and maybe more. The aim of the series is to learn about deploying all components onto the Ravello cloud.

Part 1: Creating the Jumphost

Part one of the series will be about creating the jumphost. I’m looking at a linux system as we do not need any license to run it and it is already available in Ravello

Creating the Ravello Application

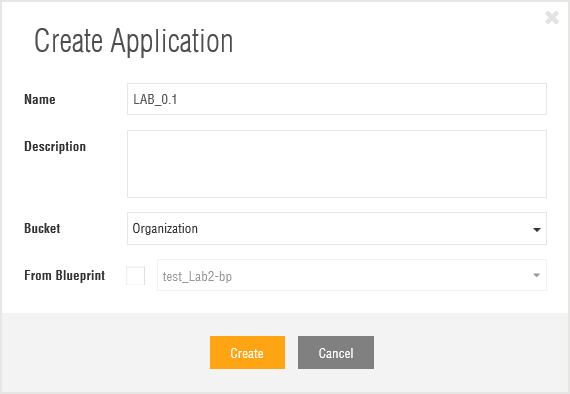
The first step is to create an application. We will create a 0.1 version of the LAB:

Create Application

Creating the Jumphost VM in the Application

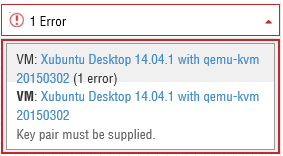
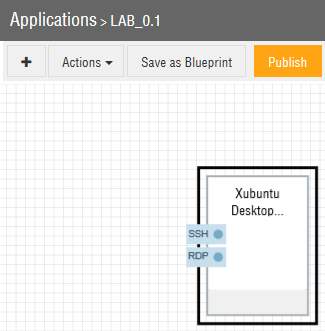
Drag a ‘Xubuntu Desktop 14.04.1 with qemu-kvm pre-installed’ onto the Canvas. Once the VM has been dragged onto the Canvas, there will be an error: ‘Key pair must be supplied’

Xubuntu error: key pair must be supplied

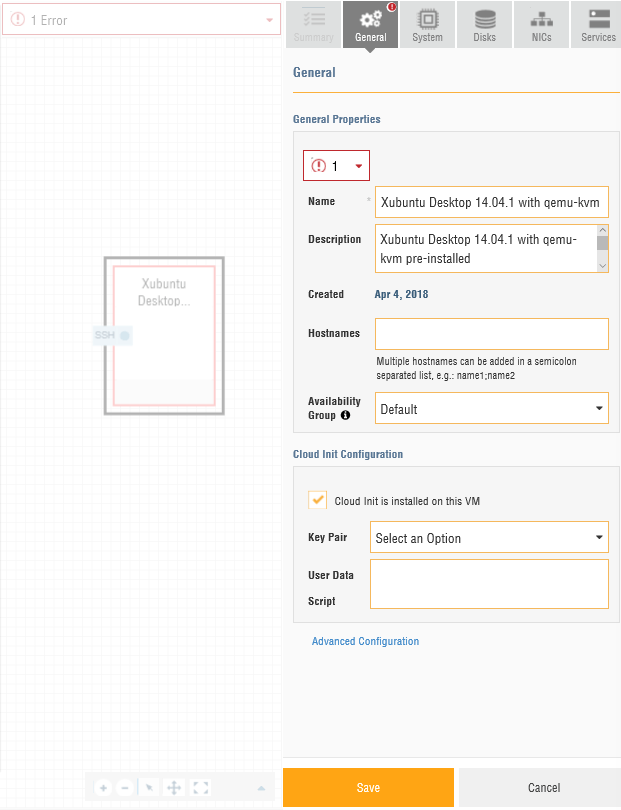
You can see that the error has its source on the General tab. To correct this a Key Pair must be created.

Xubuntu VM details error

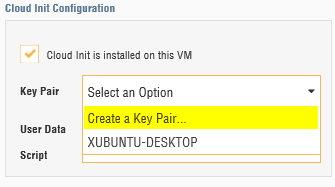
On the General tab – Cloud Init Configuration – Key Pair

Select the Option: Create a Key Pair

In the following screenshot you can see that I already created a Key Pair

Create a Key Pair

Once created, the private key will be available for download. To be able to use the private key with a ssh session from putty, you will need to convert the key.pem to key.ppk. Open puttygen and load the key.pem file and save the file as key.ppk.

Now that we have created our key pair we can save the VM and the error should disappear.

On the System tab, change the # CPU to 2 and the memory to 3 GB.

On the Disks and NICs tab we leave everything as is.

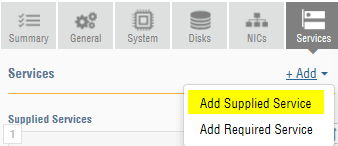
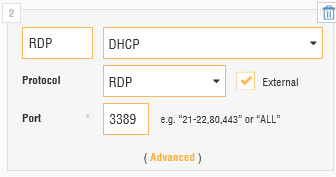
On the Services tab, Add Supplied Service. We will use this Service to connect to the VM via RDP.

Add Supplied Service

A second service will be added. I changed the name to RDP and chose protocol RDP which sets the Port to 3389.

Add RDP Service

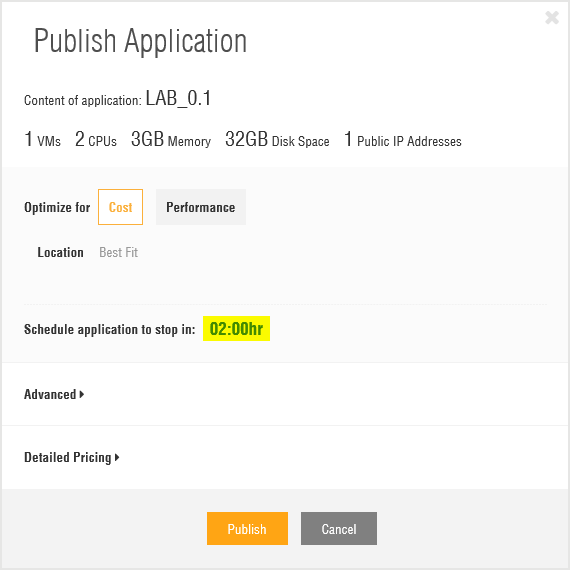
We are ready to publish the application:

Publish the application
Confirm publishing the application

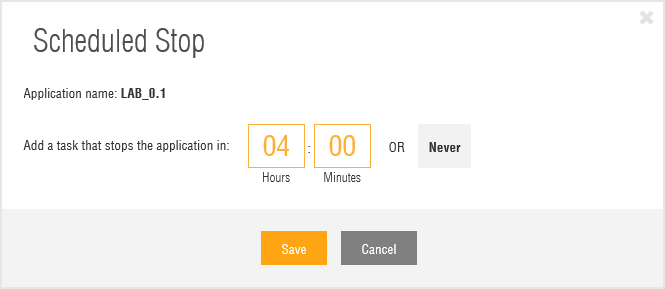
Change the ‘Schedule application to stop in:’ countdown timer to ‘04:00hr’. This will give us the time to update and change the VM to our needs.

Add Scheduled Stop

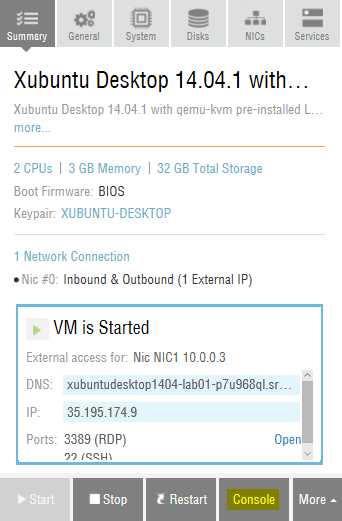
Publish will power on the VM. When Powered on we will have access to the Console. Powering on the VM takes a couple of minutes.

Xubuntu VM running

Customizing the Jumphost VM

Upgrades

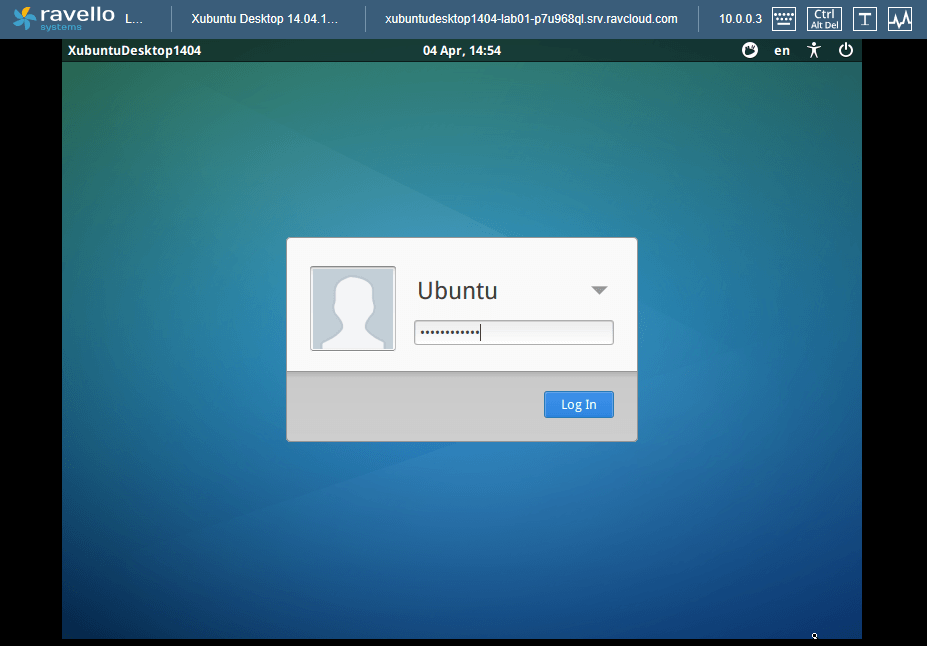
The Console will open in a new tab. The initial password for this VM is ‘ravelloCloud’.

Xubuntu VM console

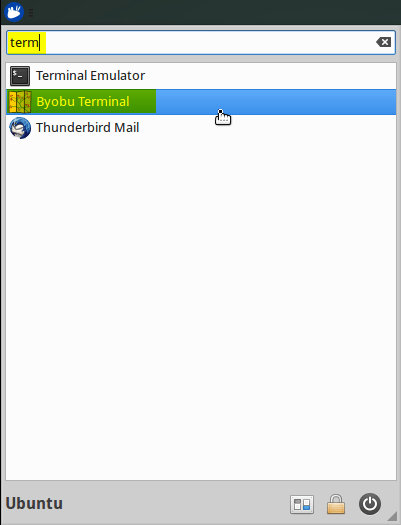
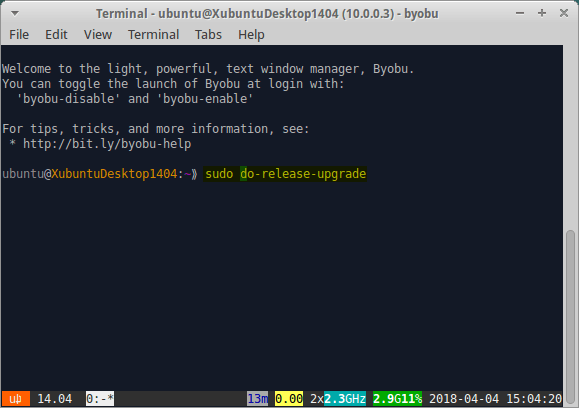
The first thing we will do is upgrade the VM to the latest release available. Open the ‘Byobu Terminal’.

Byobu Terminal

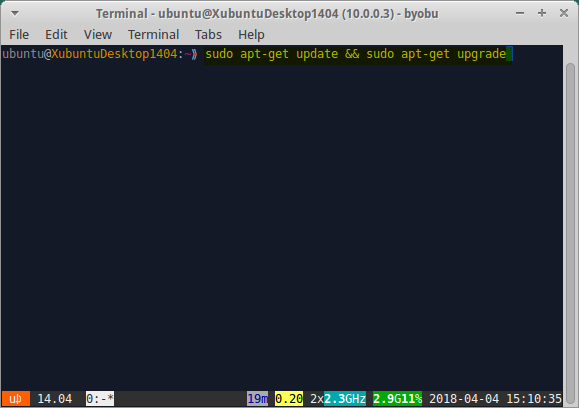
Run the command ‘sudo apt-get update && sudo apt-get upgrade’ and confirm you want to upgrade all proposed packages. I tried do-release-upgrade first, which failed because of an apt dependency.

sudo apt-get update && sudo apt-get upgrade
ShellSession

Upgrade packages

Now we are ready to upgrade to the latest release. Confirm to all new version configuration files from the package maintainer. In the end all obsolete packages can be removed and reboot when finished.

Upgrade OS release

Run the command ‘sudo apt-get dist-upgrade’ and confirm you want to upgrade all proposed packages. Now your system will be fully up-to-date.

XRDP 0.9.x

Install xrdp 0.9.x so that we can connect via RDP. This will be a more pleasant way of working.

We will add a PPA (Personal Package Archive) to add the package source location to the /etc/apt/sources.list file. This will enable updates through the apt update process. We will install the latest version of xrpd from this location. At the time of writing the version integrated is in the ubuntu sources is 0.6.x. The latest stable version has quite some enhancements like shared clipboard support.

sudo add-apt-repository ppa:hermlnx/xrdp
sudo apt-get update
sudo apt-get install xrdp
xrdp -v
ShellSession

The version installed at the time of writing is 0.9.4

Check xrdp install version

Create xsession file with contents xfce4-session. The latest xrdp version should be detecting the desktop environment by default but in my case it did’t and wouldn’t work without the following xsession file.

cd $HOME
echo xfce4-session > ~/.xsession
ShellSession

Generate new certificate and key

openssl req -x509 -newkey rsa:2048 -nodes -keyout key.pem -out cert.pem -days 365
ShellSession

Update XRDP to use the new certificates

cd /etc/xrdp
sudo vi xrdp.ini
ShellSession

Change the following lines to use the certificate and key generated

certificate=/home/ubuntu/cert.pem
key_file=/home/ubuntu/key.pem
ShellSession

Change wrapper.config

cd /etc/X11/
sudo vi wrapper.config
ShellSession

Change the following line

allowed_users=anybody
ShellSession

Reboot the VM

Now you can access the VM through RDP. You will need to confirm the self-signed cert as it has not been signed by a trusted root CA.

Powershell Core

Import the public repository GPG keys

curl https://packages.microsoft.com/keys/microsoft.asc | sudo apt-key add -
ShellSession

Register the Microsoft Ubuntu repository

curl https://packages.microsoft.com/config/ubuntu/16.04/prod.list | sudo tee /etc/apt/sources.list.d/microsoft.list
ShellSession

Update the list of products

sudo apt-get update
ShellSession

Install PowerShell

sudo apt-get install -y powershell
ShellSession

Start PowerShell

pwsh
ShellSession

PowerCLI 10

Install the PowerCLI module from the PowerShell Gallery

Install-Module -Name VMware.PowerCLI -scope CurrentUser
PowerShell

Verify PowerCLI version

Get-PowerCLIVersion
PowerShell

OPTIONAL: Opt-out from the Customer Experience Improvement Program (CEIP)

Set-PowerCLIConfiguration -scope user -ParticipateCeip $false
PowerShell

OPTIONAL: Do not display the warning about using self-signed certificates

Set-PowerCLIConfiguration -InvalidCertificateAction Ignore
PowerShell

OPTIONAL: Visual Studio Code

Installing Microsoft Visual Studio Code can be usefull for creating scripts that will/could be used within the environment.

curl https://packages.microsoft.com/keys/microsoft.asc | gpg --dearmor > microsoft.gpg
sudo mv microsoft.gpg /etc/apt/trusted.gpg.d/microsoft.gpg sudo sh -c 'echo "deb [arch=amd64] https://packages.microsoft.com/repos/vscode stable main" > /etc/apt/sources.list.d/vscode.list'
sudo apt-get update
sudo apt-get install code # or code-insiders
ShellSession

The next parts will be setting up the ESXi machines and VCSA.

Many thanks to: