Today I was playing around with vSphere with Tanzu. I want to consume vSphere with Tanzu and...

Today I was playing around with vSphere with Tanzu. I want to consume vSphere with Tanzu and...
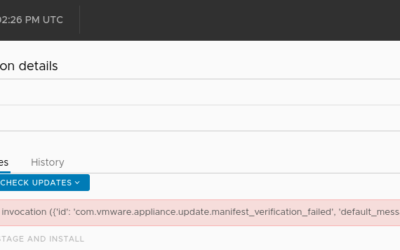
Today I deployed a new VCSA 7 U1 and as U2 has GA'd recently I wanted to update the environment...
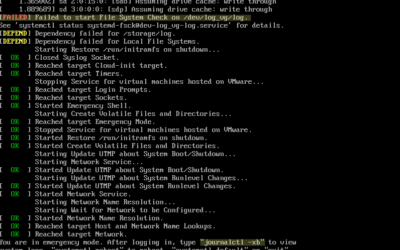
Where do I start troubleshooting?journalctl -xbFile System CheckOther volumesRebootRemark Due to a...
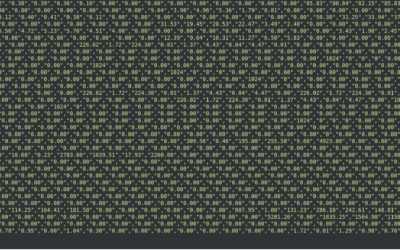
When you connect to your ESXi host and you launch esxtop. You look at the esxtop output and it is...
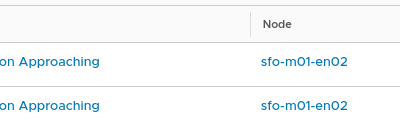
The challenge I have a couple of NSX-T environments in my home lab. I logged on to one of them and...

This post is not as a end-to-end upgrade guide but a methodology guide. Everything is more or less...

Sometimes you want/need use iPerf to test the nic speed between two ESXi hosts. I did because I...
I have been working on a script to deploy environments on a regular basis in my homelab. While I...

Struggling with errors while using the Cross vCenter vMotion Utility? This guide walks through...

Are you passionate about VMware technologies and eager to connect with like-minded professionals...