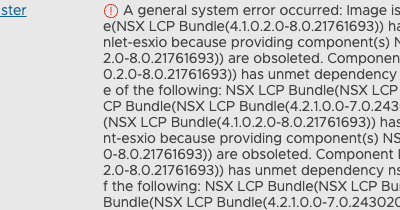
Due to a power failure of the storage where the vCenter Server Appliance resides, the VCSA does not boot. Connecting to the console shows the following output:
When you see this screen, none of the services are started as the appliance does not fully start. This implies that there is no means of connecting to the H5 client nor the VAMI interface on port 5480.
Why does the VCSA not boot and where do I start troubleshooting?
There are two important things to mentioned on the screenshot above, this is where we start:
Failed to start File System Check on /dev/log_vg/log
journalctl -xb
First we take a look at ‘journalctl -xb’. To do this we need to supply the root password and launch the BASH:
Now that have shell access we can take a look at ‘journalctl -xb’:
Shell
1
journalctl-xb
Type G to go to the bottom of the log file:
Shell
1
G
journalctl -xb
Work upwards, the most relevant logs will be at the bottom. For the sake of this blog post, I have type -S. This will turn on/off word wrap, in this case, I turned on word wrap.
File System Check
Going up a little I find these entries:
There is a problem with a certain inode and File System Check (fsck) should be run. Let’s see how we can do that. Is it as simple as running:
Shell
1
fsck/dev/mapper/log_vg-log
It seems like it. Running the above command finds some errors and suggests to repair. I confirmed.
Other volumes
Let’s check the other logical volumes (lvm). First we will run ‘lsblk’ to take a look at the drive layout:
Shell
1
lsblk
Remark: When we take a look at the type, we see the disks, eg. sda, sdb, etc… The difference between sda and the rest is that sda is partitioned with standard partitions and on the rest the disks an LVM has been created.
I checked all other volumes and found none of them were having issues.
Reboot
To reboot while you are in maintenance boot:
Default
1
reboot--force
After the reboot, I could connect to the H5 client and clear the relevant errors.
Remark
This blog post is very similar to this one here. Although they are very much alike, the issues in the older blog post were on a standard partition on a VCSA 6.5 whereas the issues described and addressed in this post are on a VCSA 7.0 LVM physical volume.
I decided to upgrade the vCenter Server Appliance from 6.5 U2 to 6.7 though it is not supported, see VMware KB. As this is not supported you will NOT want go ahead with this in a production environment. Maybe I will have regrets later on too … but this is my lab environment so the alternative is to redeploy a new VCSA.
Update:
While it was not possible at the time of writing of this post. This VMware KB has been updated with the following information.
Important: vSphere 6.5 Update 2d and higher are not supported to upgrade to vSphere 6.7 Update 1. vSphere 6.5 Update 2d and higher are supported to upgrade to vSphere 6.7 Update 2. For more information, see VMware Product Interoperability Matrices.
I have applied the following knowledge base articles on the source VCSA:
The first KB was applied because the installer is failing due to a lack of disk space on the source appliance. The installer gives the opportunity to supply a location on the source VCSA to export the necessary files that facilitate the upgrade.
The second KB was applied because the VMware Directory failed during the firstboot phase after the upgrade succeeded.
I downloaded the sources for VCSA 6.7.0 but had to go and download the sources for VCSA 6.7.0a. The VCSA 6.7.0 sources stalled at 5% on VMware Identity Management Service.
I also went to change the root password expiration to no and set the administrator@vsphere.local account password to only include alphabet characters.
The installer will also fail after the first phase if the VAMI port is not reachable, the first phase will finish succesfully though. I forgot to add an exception to my firewall. You can then continue the installer by going to the VAMI interface on port 5480.
I had downtime in my lab due to an power failure which resulted in a boot failure of my VCSA 6.5 appliance. Looking on the console showed me a “[FAILED] Failed to start File System Check on /dev/dis…uuid/uuid. See ‘systemctl status system-fsck-root.service’ for details.” message. Therefor it booted into ‘Emergency Shell’ or ‘Emergency mode’.
I ran the command ‘systemctl status systemd-fsck-root’ manually. This showed me that the ‘/dev/sda3’ partition was having issues.
UPDATE: It also states “RUN fsck MANUALLY”. I did not notice this the first time
I tried to run fsck with no options to see if the command was known to the CLI. I then ran the command with the partition as a parameter ‘fsck /dev/sda3’. I answered ‘y(es)’ to all ‘Fix<y>?’ questions.
In the end I received the message ‘FILE SYSTEM WAS MODIFIED’ and tried to reboot. The reboot command gave me an error so I went through the ESXi to reset the virtual machine. Afterwards I was able to login again.