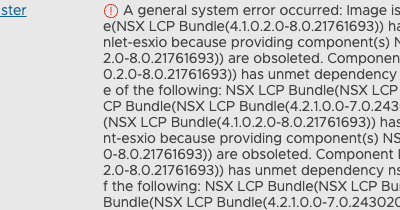
When you connect to your ESXi host and you launch esxtop. You look at the esxtop output and it is not displaying as it should. Instead, it is displaying like in the below screenshot:
Your esxtop output will be displayed correctly if you are using a terminal emulator that defaults to xterm as the TERM environment variable. Some terminal emulators will use another terminal emulator value by default, eg. xterm-256color. ESXi does not map xterm-256color to one of the values it knows, so it doesn’t know how to display the output.
There is a KB article that explains how to resolve:
The value of the environment variable TERM is used by the server to control how input is recognized by the system, and what capabilities exist for output.
Let us have a look first what the TERM variable is in my case:
Shell
1
echo$TERM
I am receiving the following output:
My terminal emulator tries to connect to the endpoint (ESXi) with xterm-256color. Now let’s take a look at what values this endpoint does support:
So all of the above is possible to assign to TERM. The value my terminal emulator uses is not among the supported terminfo types. So the ESXi host cannot map to any of the known and thus does not know how to display the esxtop info correctly.
When we update the TERM environment variable to xterm and try to run esxtop again, the output will show nicely formatted.
Default
1
2
TERM=xterm
echo$TERM
Let’s check esxtop again to make sure the outcome is as expected:
The Horizon Client installer generates the following errors for Multimedia Redirection:
Adding the following symlinks made the failure message go away. I’m wondering though if the packages get updated in the repositories whether this will break the Multimedia Redirection (MMR). I guess I’ll notice some day.
Update (2019/12/20): Today I updated from version 5.2 to 5.3 and ran into the same issue again. I noticed that there are symbolic links present but that they linked to the old versions. After updating the symbolic links the installer was happy again.
Setting up the lab in Ravello – Part 1 : the jumphost
In these series we will create a lab with multiple components, a jumphost, vcsa, esxi, a vsan enabled cluster, nsx and maybe more. The aim of the series is to learn about deploying all components onto the Ravello cloud.
Part 1: Creating the Jumphost
Part one of the series will be about creating the jumphost. I’m looking at a linux system as we do not need any license to run it and it is already available in Ravello
Creating the Ravello Application
The first step is to create an application. We will create a 0.1 version of the LAB:
Creating the Jumphost VM in the Application
Drag a ‘Xubuntu Desktop 14.04.1 with qemu-kvm pre-installed’ onto the Canvas. Once the VM has been dragged onto the Canvas, there will be an error: ‘Key pair must be supplied’
You can see that the error has its source on the General tab. To correct this a Key Pair must be created.
On the General tab – Cloud Init Configuration – Key Pair
Select the Option: Create a Key Pair
In the following screenshot you can see that I already created a Key Pair
Once created the private key will be available for download. To be able to use the private key with a ssh session from putty, you will need to convert the key.pem to key.ppk. Open puttygen and load the key.pem file and save the file as key.ppk.
Now that we have created our key pair we can save the VM and the error should disappear.
On the System tab, change the # CPU to 2 and the memory to 3 GB.
On the Disks and NICs tab we leave everything as is.
On the Services tab, Add Supplied Service. We will use this Service to connect to the VM via RDP.
A second service will be added. I changed the name to RDP and chose protocol RDP which sets the Port to 3389.
We are ready to publish the application:
Change the ‘Schedule application to stop in:’ countdown timer to ‘04:00hr’. This will give us the time to update and change the VM to our needs.
Publish will power on the VM. When Powered on we will have access to the Console. Powering on the VM takes a couple of minutes.
Customizing the Jumphost VM
Upgrades
The Console will open in a new tab. The initial password for this VM is ‘ravelloCloud’.
The first thing we will do is upgrade the VM to the latest release available. Open the ‘Byobu Terminal’.
Run the command ‘sudo apt-get update && sudo apt-get upgrade’ and confirm you want to upgrade all proposed packages. I tried do-release-upgrade first, which failed because of an apt dependency.
sudo apt-get update && sudo apt-get upgrade
Now we are ready to upgrade to the lastest release. Confirm to all new version configuration files from the package maintainer. In the end all obsolete packages can be removed and reboot when finished.
Run the command ‘sudo apt-get dist-upgrade’ and confirm you want to upgrade all proposed packages. Now your system will be fully up-to-date.
XRDP 0.9.x
Install xrdp 0.9.x so that we can connect via RDP. This will be a more pleasant way of working.
We will add a PPA (Personal Package Archive) to add the package source location to the /etc/apt/sources.list file. This will enable updates through the apt update process. We will install the latest version of xrpd from this location. At the time of writing the version integrated is in the ubuntu sources is 0.6.x. The latest stable version has quite some enhancements like shared clipboard support.
The version installed at the time of writing is 0.9.4
Create xsession file with contents xfce4-session. The latest xrdp version should be detecting the desktop environment by default but in my case it did't and wouldn't work without the following xsession file.