This post is not as a end-to-end upgrade guide but a methodology guide. Everything is more or less straight forward if one uses the correct methodology.
As this is a home lab I have chosen not to add complexity by adding additional nodes to the various components for High Availability but depend on vSphere HA. This eases and shortens my upgrade path. In a production environment every application should be evaluated and talked through with the stakeholders whether it can rely on vSphere HA or some form of application HA should be introduced.
The release of vSphere 7 introduced a starting point for an update/upgrade round in the lab. I have not always used the methodology when upgrading components as I should have in the lab. When I used this methodology in the current upgrade round it has come to light that some components were not interoperable with each other. Why is this important? If you have a problem with your environment and you call VMware support, they will go through the logs and verify the environment is on par with the documentation.
So where do I start?
Reading the docs first takes time but it will save a lot of time in the long run. Can’t stress it enough RTFM !!
I always create my own high level upgrade guide. This will include the research that I have done and it also includes the upgrade path to follow.
Phase 1: Information gathering
Determine the components and versions
Be thorough in determining the components and versions (BOM or Bill Of Materials).
VMware vSphere 6.7U3
vRealize Log Insight 4.5
vRealize Operations 7.5
VMware Horizon 7.11
You will see below that I had forgotten to include VMware Horizon in my component set. This could have been catastrophic as some components might stop to work when you don’t follow the correct upgrade procedure.
Gather the documentation
After you determine which components are used in the environment you can go and search for the necessary documentation. Find the release notes, upgrade guides and other relevant documentation
What I learned from these documents was that I was not sure the NVMe drives in my hosts would be compatible. After all they are consumer grade NVMe drives and are not on the VMware HCL. I recently installed two NVMe drives, a CT500P1SSD8 and a CT1000P1SSD8 and at the time of install the Crucial CT500P1SSD8 was not recognized. A quick googling showed me a blog post from William Lam that replaced the vSphere 6.7 U3 nvme driver with one from a vSphere 6.5U2 install. I will discuss how I determined if there would be issues around this in ESXi 7.0 in a later phase.
All components should be checked with the vendor and the VMware HCL. Be aware that the vendor and VMware might not always agree and that the VMware HCL might not always be in sync with the the documentation of the hardware vendor. You should always follow the VMware HCL but be aware of the following KB. If vSAN hardware is involved it is advised to use extreme caution as this has a specific section of the Broadcom Compatibility Guide for vSAN Ready Nodes and for Build Your Own
VMware Product Interoperability Matrix overview
I did a research on which versions would be compatible with vSphere 6.7 and vSphere 7.0 as I was not yet sure if would be able to upgrade to vSphere 7.0
One product I forgot about was VMware Horizon. I’m currently on 7.10 and the VMware Product Interoperability Matrix show that at least 7.12 is needed to be supported. As I currently use Horizon with a full clone this should not pose much problems and I am planning to upgrade this as well. If I would be using Linked Clones or Instant Clones this could have been worse.
Update sequence for vSphere 7.0 and its compatible VMware products
Now that we checked all the info on whether everything would be compatible and supported after the upgrade, it is time to check the knowledge base article on the update sequence. This article shows what must be upgraded before another component can be upgraded to keep a supported environment.
Phase 2: The upgrade
vRealize Log Insight upgrade
vRealize Log Insight was running version 4.6. Digging back through the release notes showed me that I had to upgrade from 4.6 > 4.7(.1) > 4.8 > 8.1. The VMware Product Interoperability Matrix showed that vRealize Log Insight 8.1 was compatible with either vSphere 6.7U3 and vSphere 7.0
The upgrade process was painless. It just took a lot of time. The process itself is straight forward. Go to Administration > Management > Cluster, upload the pak file and follow the screens. In my case again and again because I did not upgrade Log Insight a long time.
vRealize Operations Manager upgrade
Upgrading the vRealize Operations Manager node is a breeze too, mainly because it is a simple setup with only one master node. vRealize Operations Manager was running version 7.5. I missed the 8.1 release so I upgraded to 8.0 first.
There are a couple of things that need some attention.
Always run the vRealize Operations Manager Pre-Upgrade Readiness Assessment Tool (APUAT pak)
Make sure to upgrade the OS through the OS pak files first, then the vROps pak file
As I upgraded to 8.0 I had to switch files to execute the 8.1 upgrade
The Pre-Upgrade Readiness Assessment Tool showed me warnings for two items:
Validating product version Make sure to run vRealize Operations Manager – 6.6.1, 6.7, 7.0 and 7.5 Virtual Appliance upgrade, as product version is 7.5.0 Ensure product and upgrade versions meet the requirements.
Product validation warning
Checking /dev/sda partition size. The size of the partition is less than 20GB. Increase the size of the partition to be greater or equal to 20 GB (https://kb.vmware.com/s/article/75298).
Partition size error
Both are easily addressed. The first one gives a warning to use the correct pak file when upgrading. The second one refers to a KB article that has only a couple of steps:
take vRealize Operations offline
shut down guest OS
increase hard disk in vCenter
boot Virtual Machine
take vRealize Operations online
After addressing both warnings I was able to upgrade.
vCenter upgrade
Simple and easy when you are already on the VCSA with an embedded Platform Services Controller (PSC).
Run the installer and choose upgrade. Supply the source vCenter information and destination vCenter information and click Next – Next – Finish. Grab a drink and wait. It is a two part process. The first part will deploy the new machine with the chosen information and the second part will migrate the data from the old vCenter to the new vCenter.
ESXi upgrade
Before the actual upgrade could take place I needed to be sure that everything would work after the upgrade. Within the vExpert vCommunity I had seen a nice and easy way to do this. I am sorry that I can’t give credits to the person that I got the idea from.
Create a bootable USB ESXi installer or use the iDRAC or equivalent technology to boot your server from the ESXi installer
Find an empty USB flash drive
Put your server in Maintenance Mode
Shutdown and boot your server from the USB installer or the iDRAC or equivalent technology
Install to the empty USB drive – BE CAREFUL not to install to the wrong location
Upgrade check workaround
ESXi will create a VMFS volume from the remaining local space where ESXi is installed by default. After installing I tried to add the ESXi host to vCenter but failed because it had detected the local VMFS volume from the original install and that was conflicting with the one that was still present in vCenter but disconnected. I rebooted the ESXi host, booted into the original drive, verified nothing was on the local drive in the original install and deleted the datastore. Rebooted again into the USB drive and now could add the USB installed ESXi 7.0 to vCenter. Now I was able to get a glimpse of how everything was seen from an ESXi 7.0 install. The NVMe drives I was worried about were showing all fine.
Again this is a home lab and not all components are on the VMware HCL so this adds some extra steps like checking from an actual install. This would not be necessary in a production environment where everything has green checks on the VMware HCL.
The actual upgrade
Upgrading ESXi hosts is done easiest through VMware vSphere – Lifecycle Manager (VMware Update Manager has been rebranded)
I imported the Dell customized ISO, created a baseline and did a Host Compliance Check. The Host Compliance Check was Incompatible and led me to the following two knowledge base articles:
I had to remove everything based on the qedi and qedf drivers
VMware Tools / VM Hardware Compatibility
Upgrading the VMware Tools and the VM Hardware Compatibility is the last part in the process. Determine the viability of each VM to upgrade the VMware Tools and the VM Hardware Compatibility. For most VMs this won’t pose a problem. Nevertheless there are some vendor appliances that will need to run a specific version.
vSAN upgrade
Although vSAN is not really a separate component to upgrade, you will need to upgrade the on-disk format. This is an online upgrade that will not impact the running VMs.
Sometimes you want/need use iPerf to test the nic speed between two ESXi hosts. I did because I was seeing a NIC with low throughput in my lab.
How can we test raw speeds between the two hosts? iPerf comes to the rescue. I was looking on how to do this on an ESXi host. I doesn’t come as a surprise that I found the solution here at William Lams’ virtuallyghetto.com. Apparently iperf has been added to ESXi since 6.5 U2. You used to have to copy iperf to iperf.copy. In ESXi 7.0 that has been done for you, although you will need to look for /usr/lib/vmware/vsan/bin/iperf3.copy
ESXi host 1 (iperf server)
Disable the firewall:
esxcli network firewall set --enabled false
ShellSession
Change to the directory containing the iperf binary
cd /usr/lib/vmware/vsan/bin/
ShellSession
Execute iPerf as server
./iperf3.copy -s -B 10.11.6.171
ShellSession
Overview of the used parameters:
-s
will start iperf as server
-B
defines the IP the iperf server will listen to
Disable the firewall
esxcli network firewall set --enabled false
ShellSession
ESXi host 2 (iperf client)
Change to the directory containing the iperf binary
cd /usr/lib/vmware/vsan/bin/
ShellSession
Execute iPerf as client
./iperf3.copy -i 1 -t 10 -c 10.11.6.171 -fm
ShellSession
Overview of the used parameters:
-i
will determine the interval of reporting back
-t
time iperf will be running
-c
client IP, will force the usage of the correct vmkernel interface
-fm
defaults to kbit/s, adding m will use mbit/s
Don’t forget to re-enable the firewall on both systems.
I have been working on a script to deploy environments on a regular basis in my homelab. While I have made great progress I have not been able to get this completed due to the lack of time. It did up my powershell script writing skills.
A while ago I followed a webinar about VMware Cloud Foundation Lab Constructor (VLC in short). This will deploy a VCF environment in a decent amount of time. With little effort I have been able to get this up and running multiple times. There are some pitfalls I ran into. My goal is to get to learn more about VCF, NSX-T and K8s all in a VMware Validated Design (VVD) setup.
You can get access too by completing the registration form at tiny.cc/getVLC.
The following files are included in the download:
Example_DNS_Entries.txt
VCF Lab Constructor Install Guide 39.pdf
VLCGui.ps1
add_3_hosts.json
add_3_hosts_bulk_commission VSAN.json
default-vcf-ems.json
default_mgmt_hosthw.json
maradns-2.0.16-1.x86_64.rpm
mkisofs.exe
plink.exe
As I already have a DNS infrastructure in place I used ‘Example_DNS_Entries.txt‘ as a reference to create all the necessary DNS entries.
Read the documentation pdf FIRST. It will give you a good insight in what will be set up, won’t be set up and how everything will be set up. I’m not planning to repeat info that is included in the documentation. The only thing that I have copied from this pdf is the disclaimer because I feel it is important:
VCF Lab Constructor Disclaimer
Below I have included the various configuration files and split them to show the different parts and also show where I deferred from the default. There are the configuration files that the VLC script will use:
Management domain:
default-vcf-ems.json → changed all ip addresses, gateways, hostnames, networks and licenses
default_mgmt_hosthw.json → changed the amount of CPUs (8 → 12), the amount of RAM (32 and 64 → 80) and the disk sizes(50,150 and 175 → 150)
Workload domain
add_3_hosts.json → changed the hostname, management IP and IP gateway
To deploy VCF and be able to deploy NSX-T you will need a good amount of resources. The mimimum of host resources to be able to deploy NSX-T is 12vCPUs (There is a workaround to lower the vCPU requirements for NSX-T) and 80GB of RAM due to the NSX-T requirements.
The configuration files
The first file is the ‘default_mgmt_hosthw.json’. This file describes the specs for the (virtual) hardware for the management domain hosts:
The second file is the ‘default-vcf-ems.json’. This file describes the configuration for all software components for the management domain:
The last configuration file is ‘add_3_hosts.json’. This configuration file is optional and can be used to prepare three extra hosts for the first workload domain:
Where did I change the defaults
There are some settings that I changed from the defaults aside from changing the names and network settings:
in the ‘default_mgmt_hosthw.json’ I have changed the CPU to 12 to be able to deploy NSX-T
in the ‘default_mgmt_hosthw.json’ I have changed the RAM 80 to be able to deploy NSX-T
How do we start
If you are meeting the prerequirements it is fairly simple. Fire up the ‘VLCGui.ps1’. This will present the following gui which will give the ability to supply all the necessary information and to connect to your physical environment. It speaks for itself, just make sure the Cluster, Network Name and Datastore field are higlighted blue like the following.
VLC GUI screen
What’s next
I hope to expand this inital post with a couple of follow-up posts. These are the topics that I’m currently thinking about:
NSX-T
importing the upgrade and deployment bundles
K8s
… and maybe more …
Additional info
Support:
Slack VLC Support channel – http://tiny.cc/getVLCSlack
Struggling with errors while using the Cross vCenter vMotion Utility? This guide walks through common issues, configuration pitfalls, and practical fixes to help you migrate VMs smoothly across vCenters.
Whilst upgrading the home lab I also decided to rebuild from scratch. There were some challenges to overcome because I have running VMs I don’t want to shut while migrating.
My current home lab setup and the go to setup is documented here (work in progress). Basically it comes down to:
Original setup: three hosts backed with iSCSI storage for running the VMs
Temporary setup:
New vCenter with two of the three hosts configured for vSAN with connection to the iSCSI datastores
Old vCenter with one remaining host running all of the VMs
Destination setup: new vCenter with vSAN datastore
I decided to take a look at the ‘Cross vCenter vMotion Utility (Moved into the product)‘. My goal was to migrate the virtual machines from the old environment. This involved moving them from the last remaining host to the two new hosts. There is not a lot of documentation available at first sight but it is straightforward to set up and configure. Although I did find some things that are worth noting.
Step 1 : Running the jar
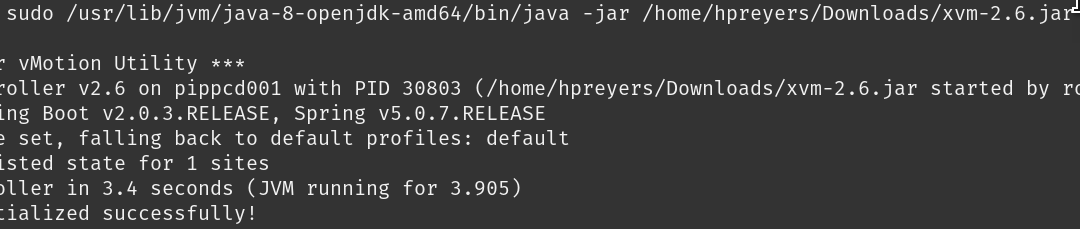
To start the Cross vCenter vMotion Utility one must run a jar file: ‘java -jar xvm-2.6.jar’.
I am running linux (Pop!_OS 18.04) as my OS. I have java version 8 and 11 installed with version 11 as default. Version 11 is not listed on the fling site as supported (Java Runtime Environment 1.8-10: See requirements). Running with version 11 (sudo java -jar xvm-2.6.jar) starts the local website on port 8080 (http://localhost:8080) but does not report back on the CLI.
Cross vCenter vMotion Utility jar output
I assumed that the java application started and failed right away. So, I decided to run it on my windows box. This box has Java Runtime environment 8 installed. The last line of feedback ‘Initialized controller with empty state’ was the same as on my linux machine. Navigating to localhost:8080 showed the Cross vCenter vMotion Utility web interface. I could now configure the application and run migrations.
It was only later when I closed the running instance on my Linux box. After restarting it, it showed me output on the CLI. The application had started successfully.
ps -df | grep -i javakill -HUP 9159
ShellSession
Show java process running
Output after restart:
Cross vCenter vMotion started successfully
Step 2 : Configuration
Register connections
Source vCenter
Destination vCenter
Step 3 : Migration
Add migrations
Source Site: source vCenter
Target Site: destination vCenter
Source Datacenter
Virtual Machine(s): Select one or more virtual machines
Placement Target: Cluster or Host
Target Datastore
Network Mapping(s): the utility will detect the source networks for all selected virtual machines and show a selection field for the target network
Common Issues and Fixes
Storage vMotion?
Storage vMotion does not seem to be supported. I tried to svMotion my machines from their iSCSI based datastores to the newly created vSAN datastore but it failed.
Target Datastore: Shared datastore (same as source)
Choosing ‘Shared datastore (same as source)’ as Target Datastore fails and throws the following error:
Storage vMotion issue
I added the destination host and tried again but it also failed with several issues:
destination networks were not listed, only a subset were – although all were added to the distributed vSwitch
matching datastore was not found on the destination host
I can migrate to the new environment but had to select a destination datastore. This was not much of a problem in my environment. The end goal was to get the virtual machine on the vSAN datastore.
After migrating most of the virtual machines, only two types were left. This made me feel like I could take a step back if needed. The following types were left to migrate, the vCenter VMs and the firewall VMs. The old vCenter is not needed anymore. However, the new vCenter and the firewall VMs are needed. Once these are migrated, I can break down the last part of the old setup. The last host will be reset to default settings via the DCUI. After this, it can be added to the vSAN cluster. Then I can make the vSAN cluster setup complete. A tmp_vSAN_policy with no redundancy is not how you want to run your environment. This is true even if it is a lab environment.
Final Thoughts and Recommendations
I could not migrate from the old environment to the new environment while also doing a Storage vMotion. I needed to go in steps.
Nevertheless I’m happy to have used the Cross vCenter vMotion Utility. It did save me a lot of work, required little setup and configuration. I didn’t need to change anything to the setup of my old nor my new environment.
Are you passionate about VMware technologies and eager to connect with like-minded professionals in Belgium? Then VMUGBE 2019 is the event you don’t want to miss. With only a few seats left, now is the time to secure your spot at one of the most impactful VMware community events in the region.
My VMUGBE 2019 Journey: A Decade of Growth
Over the past 10 years, I’ve attended nearly every edition of VMUGBE. The event grew from 15 visitors to more than 200 last year. Each time, I’ve walked away with new insights, stronger connections, and a deeper understanding of the VMware ecosystem. This event has been instrumental in my professional development, even helping me earn the VMware vExpert title two years in a row.
Top Reasons to Join the VMUGBE 2019 VMware Community Event
Free Registration
VMUGBE is a free tech event thanks to generous sponsors. You’ll get access to high-quality sessions, networking opportunities, and even meals—without spending a cent.
Expert-Led Sessions
This year’s agenda features 16 sessions across 3 parallel tracks, covering cutting-edge topics like:
Cloud Native Apps (CNA)
VMware Horizon View
VMware Cloud on AWS
VMware Blockchain
Internet of Things (IoT)
Networking with VMware vExperts
Meet and learn from Belgian VMware vExperts, including those who’ve shaped the local tech community. Whether you’re a beginner or seasoned pro, the conversations here are invaluable.
Free Food & Prizes
Enjoy a free breakfast, lunch, and BBQ, and stand a chance to win a smartphone giveaway—just for showing up and engaging.
Must-see Sessions at VMUGBE 2019
Here are a few sessions I’m especially excited about:
VVOLS in Practice by Maarten Van Driessen – Real-world insights from the field. (@mvandriessen – brisk-it.net)
PowerCLI Deep Dive by Luc Dekens – Even seasoned users will learn something new. (@lucd – lucd.info)
Creative VDI Use Cases by Johan van Amersfoort – A fresh take on virtual desktop infrastructure. (@vhojan – vhojan.nl)
vExpert Community Panel – My first public speaking experience! I’ll share how VMUGBE helped me become a vExpert.
Tips for First-Time Attendees
Arrive early for the keynote by Joe Baguley, CTO of VMware EMEA.
Step out of your comfort zone—talk to people during meals and breaks.
Visit https://www.vmug.be/ for full details and registration.
Final Thoughts on VMUGBE 2019
VMUGBE is more than just a tech event—it’s a community experience. Whether you’re looking to grow your career, learn new skills, or simply connect with others in the VMware space, this is the place to be.
Special thanks to Erik Schils for organizing another fantastic edition. Let’s make VMUGBE 2019 the best one yet!